We are less than 2 weeks away from Christmas and I thought today I would share some tips and instructions on making simple but elegant centerpieces and wreaths. I know you can find hundreds and hundreds if not thousands of idea on Pinterest, but I want to share with you my simple secrets. Most of you have already decorated, so I hope this article helps you plan ahead for next Christmas and the holiday party you are thinking about having!
Let me start by saying, I love certain craft projects. I love to do cross-stitch (preferably counted – where you have to count all the little x’s) and I love to decorate for the holidays (really any occasion!!). I can’t draw, paint, knit, sew, etc. Shoot, I can barely draw a straight line with a ruler! Those that know me well, are probably shaking their heads yes in agreement. So to you that are far more artistic and craft talented, weigh in on your tips and secrets, and for those of you that think you would never attempt any of these things – if I can do it you can do it.
Two of my all-time favorite stores are Michael’s and Stats (in Pasadena, CA). Unfortunately I believe Stats closed earlier this year and is reopening with a smaller “boutique type” store. So back to Michael’s or whatever your favorite go-to store is for decorations and ideas. Michael’s typically has their holiday items on sale as soon as they put them out (around October) and then again starting early to mid-December. You can get GREAT deals now for next year – and who doesn’t love a deal. Before we launch into making wreaths and centerpieces, here’s my funny story for this year. I love picks  and ribbon – they go on wreaths, centerpieces, with greens, on presents and anything else you can think of. So last year when they went on sale, I stocked up, with my hubby wondering why in the world I would have so many of those “little things” and soooo much ribbon. Well, a few weeks ago I volunteered to provide centerpieces for an organization I belong to’s Christmas party. Voila – what came in handy but those picks and some of the ribbon I had purchased last year. All I had to purchase were the wreaths (ON SALE). When items are 50-60% off – how can you go wrong aaaaand it makes your decorations less expensive to make.
Whether you are making a large wreath (36″) (hanging on my husband’s office door), 
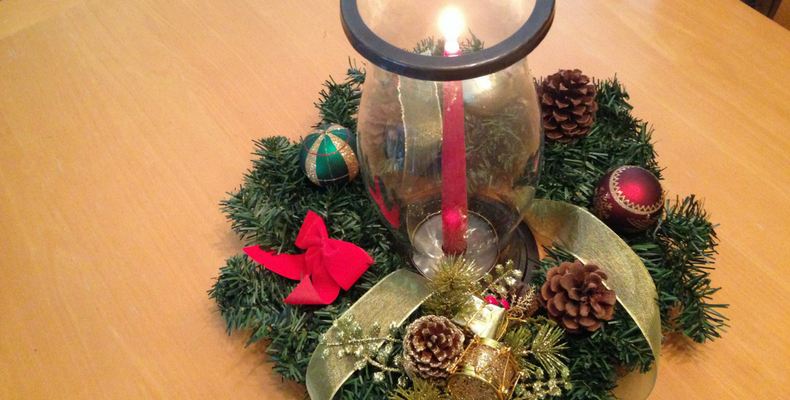
 a smaller wreath (6 – 8″) or a center piece, the process is all the same. Choose your color scheme – (for the large wreath I choose white and red). Then select your ribbon and accessories to decorate your wreath. You will need a glue gun and you may need floral wire and wire cutters. I have made wreaths 3 ways – 1) putting your ribbon on first and then adding your decorations around the ribbon 2) putting your decorations on first and working you ribbon around them, or 3) no ribbon and all decorations.
Let’s start with scenario #3 
Once you have chosen what you think will go on your wreath, begin laying the decorations on it. I like to slide the picks in the wreath as I place them. Just continue placing them on the wreath until it is as full as you like. Now for our front door wreath, nothing is glued down – this gives me the option each year to change it up. I love red bows (thank you Mom), so I put a bow on the bottom where it can hang freely.
Scenario #2 (decorations first) 
My color scheme on this large wreath was rust, orange, brown and gold. I wanted something different. I started with the decorations laid on the wreath. I then took the ribbon and wove it in and around my decorations and around the wreath, to get the look I wanted. This gets a little tricky when trying not to knock your decorations off. At this time you may need to move your picks (etc) around a little. I suggest taking a picture of the “final” look for reference. Remove the ribbon and secure your decorations onto the wreath. Now weave your ribbon back into and around your wreath. Secure both ends to the back of the wreath with your glue gun. This is also a little tricky and a balancing act, especially for the larger wreaths! You can do it!!!
Scenario #1 (ribbon first) 
Weave your ribbon around your wreath. For whatever reason, this year I chose to not use a lot of ribbon on the centerpieces and wreaths. Tuck the ends of the ribbon into the back of the wreath to hold it temporarily. Place your decorations on your wreath. Again take a picture for reference. Remove the decorations and glue your ribbon to the back of the wreath. Finish by gluing your decorations onto the wreath.
I encourage you to be creative with your color scheme, type of ribbon (wire/no wire, different widths) and type of decorations (picks, ornaments, ribbons, fruit (artificial), pine cones, candy canes, or anything else you can find. I hope you found these tips helpful. Now when you are planning your holiday party next year (wink wink) – you already have beautiful wreaths and centerpieces you can use for decorations and show off to your guests. Happy wreath and centerpiece making!
“Blessed is the season that engages the whole world in a conspiracy of love”
– Hamilton Wright Mabie
Nicely done, Jill! Great ideas & tips on how to do these beautiful wreaths!
Thank you!
Merry Christmas to you & yours!
XO🎄🎈⛄️🎅🏻❤️🍾
Donna
Thank you Donna. Merry Christmas!
Congratulations on a very beautiful and creative blog, Jill!
Thank you Sandy!
Beautiful wreaths. I might make some as gifts for next year. Thanks for all the good tips!!
Thank you. Have fun. I know yours will be gorgeous!